What Is an Online Image Splitter and How Does It Work?
An online image splitter is a browser-based utility that takes a single source graphic and slices it along exact horizontal, vertical, or matrix coordinates into multiple smaller image files. Whether you need to split a wide panorama into a swipeable Instagram carousel, turn a hero photograph into a 3x3 Instagram profile grid puzzle, divide a tall full-page screenshot into readable sections, or extract uniform pixel tiles for web apps and 2D games, an automated splitter ensures every cut lines up to the pixel without manual cropping in heavy desktop editors.
Unlike legacy cloud converters that force you to upload high-resolution files to remote servers and wait in processing queues, the WebToolsHub Image Splitter runs 100% client-side in your browser memory using the HTML5 Canvas 2D engine. Your PNG, JPG, WebP, GIF, SVG, or AVIF photos never leave your device, making it fast and completely private for personal photography, unreleased product mockups, client assets, and sensitive documentation.
How to Split an Image Online (Step-by-Step Guide)
Splitting a photo takes less than ten seconds and works cleanly on both desktop browsers and mobile phones:
- Upload or Paste Your Image: Drag and drop your file into the upload zone, click Choose Image, press
Ctrl+Vanywhere on the page to paste a screenshot from your clipboard, or click Try Sample Panorama to test the interactive workspace immediately. - Choose a Quick Preset or Split Mode: Pick a 1-click shortcut such as Split in 2 (Vertical), Split in 3 (Vertical), Split in 4 (2x2), Instagram 3x3 Grid, or Carousel 3 Slides, or customize exact rows, columns, and pixel dimensions under the mode tabs.
- Verify the Live Cut Overlay: Check the dashed cut lines and numbered badges directly on top of your source image. In Instagram mode, use the Horizontal Pan and Vertical Pan sliders to adjust framing so important faces or headlines stay centered inside the crop box.
- Select Format and Export: Choose lossless
PNG, lightweightJPG, or web-optimizedWebP, set your naming order, click Split Image Now, verify adjacent alignment in the Swipe Preview tab, and click individual tiles or Download All as ZIP.
Split Image in 2, 3, 4, or Custom Grid Dimensions
Different projects call for very different slicing geometry. Under the Grid (Rows x Cols) tab and quick preset bar, you can cover every everyday image cutting scenario without doing manual division math:
- Split Image in 2 (Vertical or Horizontal Halves): Set
1 row x 2 columnsto slice a wide banner or dual-page scan into clean left and right halves, or2 rows x 1 columnto cut a tall infographic into crisp top and bottom panels. - Split Image in 3 (Panoramic Trio or Horizontal Strips): Set
1 row x 3 columnsfor classic three-panel social banners, triptych prints, and hero showcases, or3 rows x 1 columnfor vertical reading breaks. - Split Image in 4 (2x2 Quadrants or 4-Panel Strips): Use
2 rows x 2 columnsto split maps, floor plans, or poster designs into four evenly printed quadrants, or1 row x 4 columnsfor ultra-wide timeline graphics. - Custom Matrix Grids (Up to 100 Tiles): Enter any row count from
1to20and column count from1to20(up to 100 tiles total per run) for digital collages, mosaic wall prints, and web storytelling grids. - Grid Gutter / Border Spacing Compensation: When splitting artwork intended for spaced grid frames (such as Instagram's 3-column profile layout or multi-frame canvas prints), adding a small pixel Gap Between Tiles removes sliver strips between cells so diagonal lines and text visually line up across margins instead of appearing offset.
Instagram Carousel and 3x3 Profile Grid Master Guide
Instagram creators and brand designers rely on splitters for two distinct post formats that follow completely different rules for aspect ratio and upload sequencing. Our dedicated Instagram Carousel & Grid tab handles both formats automatically so you never export the wrong pixel ratio.
1. Seamless Swipeable Instagram Carousels
A seamless carousel lets viewers swipe horizontally through one continuous landscape photo, product showcase, or wide graphic across 2 to 10 frames. Instagram recommends uploading slides at a consistent width of 1080px so its compression pipeline does not crop or misalign neighboring frames:
- Portrait Carousel (4:5 Ratio, Best Engagement): Each slide outputs at exact
1080 x 1350 pxdimensions. A 3-slide seamless panorama covers3240 x 1350 px, while a 5-slide panorama spans5400 x 1350 px. Because 4:5 takes up maximum vertical screen real estate in the mobile feed, this is the top choice for storytelling, tutorials, and product launches. - Square Carousel (1:1 Ratio): Each slide outputs at exact
1080 x 1080 pxdimensions. A 2-slide square split equals2160 x 1080 px, and a 3-slide split equals3240 x 1080 px. Ideal when reusing 1:1 graphics across Instagram and LinkedIn carousels. - Crop to Fill vs. Fit Whole Image (Padded): If your source panorama is shorter or taller than 4:5, choose Crop to Fill and slide the focal pan controls to keep subjects framed edge-to-edge, or switch to Fit Whole Image with a custom hex background color so zero pixels of your original artwork are clipped.
- Carousel Posting Order: Always upload carousel slides in normal left-to-right sequential order (Slide 01 first through Slide N last) inside a single multi-photo Instagram post. Use our interactive Swipe Preview strip before exporting to verify zero hairline seams between adjacent slides.
2. Instagram 3x1, 3x3, and 3x4 Profile Grid Puzzles
Profile grid banners turn multiple individual feed posts into one giant cohesive artwork when visitors open your Instagram profile tab. While Instagram supports square (1080 x 1080 px) and vertical (1080 x 1350 px) thumbnails, the single biggest mistake creators make is uploading tiles in top-to-bottom order.
Because Instagram always pushes the newest post to the top-left slot of your 3-column profile, uploading tile #1 first pushes it down to the bottom-right corner by the time you post tile #9. To assemble a 3x3 profile puzzle correctly, select the Instagram Reverse Upload Order naming option and follow the Upload #1 through Upload #9 badges shown on every output card (posting bottom-right first and finishing with top-left last).
Once your grid or carousel tiles are ready, pair them with clean spacing and readable captions using our Instagram Bio & Caption Line Break Generator or read our step-by-step guide to adding invisible line breaks in Instagram captions, plus style profile hooks with our Instagram Font & Fancy Text Generator.
Fixed Pixel Tile Splitting for Developers, Documentation, and Game Assets
Beyond social design, developers, technical writers, and indie game creators frequently need fixed-pixel cuts rather than proportional percentages. Switch to the Exact Pixel Size tab whenever exact pixel dimensions matter:
- Splitting Tall Website Screenshots for PDFs & Tickets: Long-page browser captures often get downscaled to blurry thumbnails when pasted into Jira, Notion, Slack, or print PDFs. Setting
tileWidthto match your screenshot width andtileHeightto1400pxslices one unreadable 8,000px capture into crisp, paginated screens. - Web Map & Deep-Zoom Texture Tiles: Generate uniform
256 x 256or512 x 512square chunks for Leaflet tile layers, WebGL canvas textures, or lazy-loaded progressive image strips. - Control Over Remainder Edge Pixels: When an image dimension is not an exact multiple of your chosen tile size (for example, slicing a
1200pxwide graphic into512pxtiles), choose from three clean edge behaviors: Keep Smaller Edge Tiles (preserves 100% of your image with narrower edge chunks), Crop / Drop Incomplete Edges (keeps only full 512px blocks), or Pad Edge Tiles to Uniform Size (fills trailing remainder canvas cleanly to full uniform width and height).
Preventing White Seam Lines: How Proportional Edge Rounding Works
Have you ever split an image in a basic online editor only to notice a faint 1-pixel gap, overlapped pixel row, or uneven slide width when lining tiles up side by side? That visual artifact happens when naive scripts divide width / cols using floating-point flooring on every piece (for example, slicing a 1000px wide photo into 3 parts of 333px drops the final pixel, or rounding up twice duplicates a seam column).
Our splitting engine prevents seam errors by computing proportional boundary coordinates across the axis: each cut boundary is snapped via Math.round((index * totalSize) / count), and every tile's source width equals nextBoundary - currentBoundary. Because tile N ends on the exact integer boundary where tile N+1 begins, the sum of all exported tile dimensions matches the source canvas down to the last pixel with zero gaps and zero duplicated edges. In scaled Instagram modes (such as 1080 x 1350), fractional source crop edges pass directly to ctx.drawImage using high-quality bicubic smoothing so continuous curves, horizon lines, and headlines transition effortlessly from one slide to the next.
PNG vs JPG vs WebP: Choosing the Best Format for Split Tiles
Picking the right output format directly impacts visual sharpness and file weight, especially on platforms that re-compress uploads:
- PNG (Lossless & Transparent): Best choice for UI screenshots, typography-heavy carousels, vector exports, logos, and graphics containing transparent backgrounds or sharp text edges. Zero compression artifacts ensure fine letters never develop JPEG ringing halos.
- JPG (Compact Photography): Ideal for DSLR or smartphone landscape photography and realistic scenes where smaller file size matters more than pixel-level edge sharpness. Keeping the quality slider between
88%and94%preserves rich color while avoiding heavy Instagram/social re-encoding bloat. - WebP (Modern Web Performance): Best choice for blogs, Next.js storefronts, and landing pages where split images are embedded directly into HTML/CSS grids. WebP typically saves 25-35% file weight over JPEG at comparable visual fidelity. For deeper optimization benchmarks, read our guide on modern web image optimization (HEIC, WebP, AVIF, and JPG).
Common Image Splitting Mistakes to Avoid
Even with pixel-accurate slicing tools, a few workflow mistakes can spoil the final result on social platforms or web pages:
- Starting With Low-Resolution Source Graphics: If you split a small
1200 x 800 pxphoto into a 5-slide Instagram carousel, each slice only contains240pxof original detail before upscaling to1080px. Aim for at least800-1080pxof original source width per planned column whenever possible. Our live warning banner alerts you automatically if source width per slide falls below 600px. - Exporting Transparent Graphics as JPG: Because the JPEG specification has no alpha channel, transparent PNG or SVG layers automatically receive a solid background fill when exported as JPG. Switch format back to
PNGorWebPwhenever transparency must remain intact. - Forgetting Smartphone HEIC Compatibility: iPhone cameras frequently save photos in Apple's native
.heicformat, which desktop browsers cannot decode natively on HTML5 Canvas. Run your iPhone photos through our HEIC to JPG Converter first (also 100% browser-based), then split your converted image seamlessly here. - Using the Same Upload Order for Both Carousels and Grids: Multi-photo carousels upload left-to-right (
01toN), whereas profile feed puzzle grids upload in reverse (bottom-right tile first). Always check our upload badge before posting to your profile feed. - Uploading Unoptimized Heavy Tiles Straight to Your Website: High-resolution lossless PNG tiles can easily exceed several megabytes if you split a large poster for web display. After splitting, optimize large web assets with our Image Resizer & Compressor or Image to WebP Converter to protect Core Web Vitals.
Related Image and Creator Tools on WebToolsHub
Complete your visual preparation workflow using these free browser-only utilities across WebToolsHub:
- Image Resizer & Compressor - Resize images or compress output tiles down to exact target KB file limits.
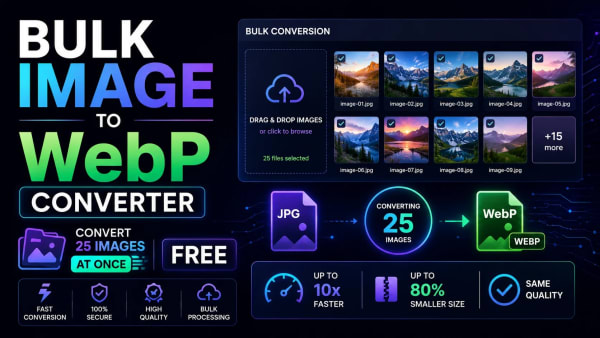
- Image to WebP Converter - Batch convert split PNG or JPG assets into fast-loading WebP files for web pages.
- HEIC to JPG Converter - Convert iPhone
.heiccamera photos to JPG or PNG on Windows or desktop before splitting. - Image to Base64 Converter - Encode lightweight sliced icons or strips directly into Base64 Data URIs or CSS sprites.
- Instagram Bio & Caption Line Break Generator - Format clean line breaks and aesthetic spacing for the posts accompanying your carousel or grid.